Creating and Editing a Group Reservation
RezOvation GT provides numerous features to help you better manage group
reservations. You can view all groups using the
reservation list, add
a group payment, create a group invoice, and
generate a group reservations
report or group revenue report.
There are two ways to create a group
reservation:
by converting
an existing reservation into a group;
by creating
a group and then adding reservations to it.
To
convert an existing reservation into a group:
If you have an existing
reservation that has multiple rooms, you can easily convert this reservation
into a group. Converting a reservation to a group splits out each
room by the room contact, and creates an individual reservation for the
room contact which contains all of their assigned rooms. You can
then easily provide split and group billing to any reservations in the
group.
Create a reservation.
Assign a room contact
to each room that will be on a separate reservation. For example,
if John Smith with be reserving Room A and B, assign him as the contact
for these rooms; if Becky Brown with be reserving Room C, then assign
her as the room contact. This will allow you to create one reservation
for John and another for Becky, while still linking them under a group.
Save
any changes to the reservation, and re-open it.
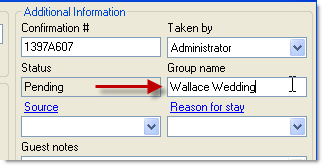
Enter
a Group name in the Additional Information section on
the right side of the reservation.
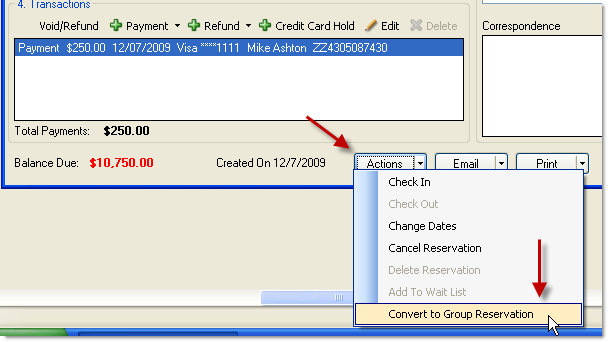
Click
the Actions button and select
Convert to Group.
You
will now see the Edit Group Reservation screen. From
here you can add reservations to the group, add group payments, apply
group payments, print a group folio, and more.

To create
a new group:
Go to the Reservation
List, click the Add button  ,
and select Add Group Reservation.
,
and select Add Group Reservation.

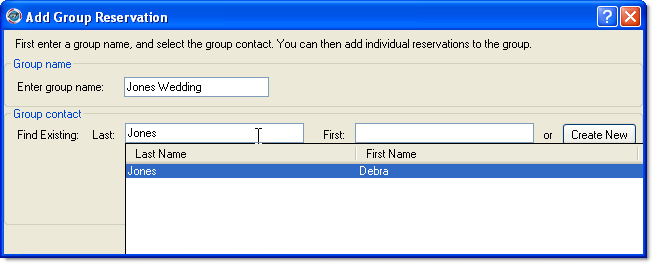
Enter a group name, select
or create the group contact, and click OK.
The Edit Group Reservation
window will appear. From here, you can add reservations to a
group by clicking the Add
button from the Reservations in this
Group section, add
group payments, apply
group payments, etc.
To add
a reservation to a group:
If you are creating a
new reservation, save it first.
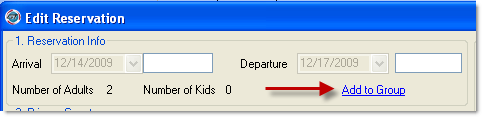
Edit the reservation
by double-clicking on it from the Reservation List or Occupancy Map.
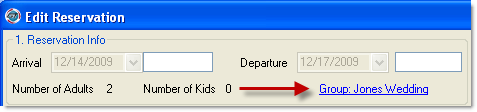
Click the Add
to Group link at the top of the window.
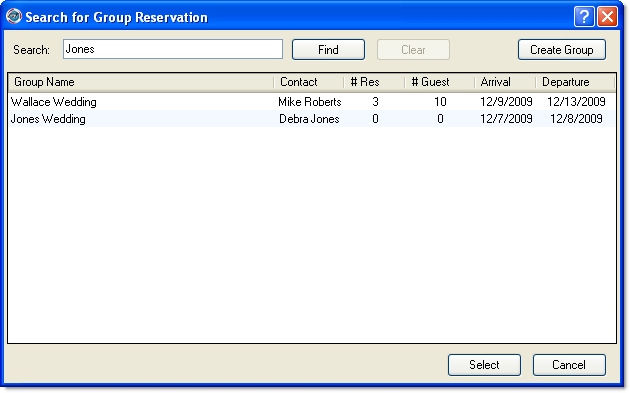
Locate the group using
the Search window. Click
Select to add the reservation
to the selected group, or click Create
Group if you need to create a new group.
The group name will now
appear on the reservation.
To
view all groups:
Go to the Reservations
List.
Select the Groups
button from the left side navigation.
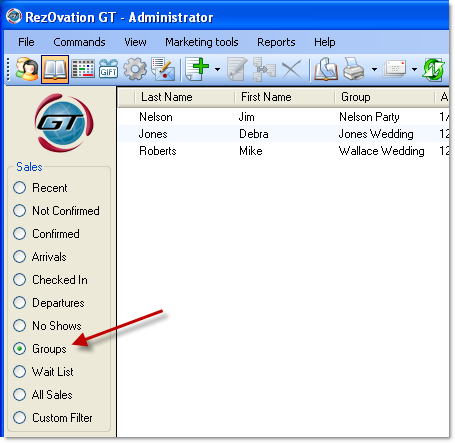
You can also search for
a group by entering the group name in the Quick
Search.

To
print a group invoice:
Open the group reservation,
click Print > Group Folio,
or
From the Reservation
List, right-click on the group an select Print > Group Folio.
To email a group invoice:
Open the group reservation,
click Email > Group Folio,
or
From the Reservation
List, right-click on the group an select Email > Group Folio.
You can also print or email confirmations, cancellations,
and other types of letters.
To delete a
group payment:
Delete any group payments
applied to individual reservations by editing those reservations
Delete or refund the group payment.
To delete a
group reservation:
Delete any group payments
applied to individual reservations by editing those reservations and
deleting the group payment listed in the Transactions
section.
Remove all reservations
from the group by selecting each reservation and clicking Delete
from the Reservations in this Group
section.
Refund any payments made
to the group account so that it has a 0 balance, or delete the payments
(note that some credit card payments cannot be deleted).
Delete the group by selecting
Actions > Delete
Group.