The occupancy map allows you to view your rooms and reservations (for up to two years in the future) along with payment status, arrivals and departures. You can also add a reservation from the occupancy map, book a multiple room reservation, move a reservation to a different room or different date, extend or shorten a reservation, block rooms out of service, manage reservations (including adding payments, check in a reservation, etc.) and print the occupancy map.
Click the Occupancy Map icon
![]() or select View
> Occupancy Map from the main menu to display the Occupancy
Map.
or select View
> Occupancy Map from the main menu to display the Occupancy
Map.
You can select the number of months to display and the month on which to begin displaying. For example, if you want to see three months of occupancy information beginning in December 2009 your selection at the top of the occupancy map will look like the following:
![]()
You can also click the Show Today button to set the view to begin at two days before today's date.
You can sort by room name, room abbreviation, or room type (if you have configured RezOvation GT to use room types).
The icons on the occupancy map indicate the following:
|
Reservation made |
|
Guest checked in |
|
Guest checked out |
|
No payment received |
|
Deposit received |
|
Paid in full |
|
Double booking |
|
No show |
If the cells in your Occupancy Map are not color coded to indicate payment
status, you can enable the display of payment
status color bands from the Configuration window.
Use the horizontal scroll bar to navigate through dates.
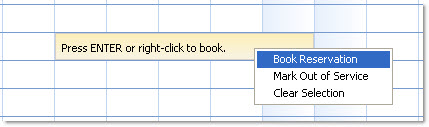
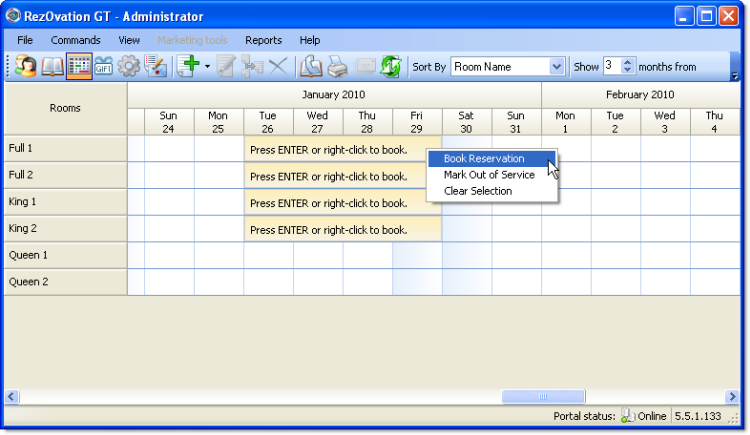
Select a date or date range for a room by dragging the mouse over the appropriate date boxes with the left mouse button depressed.
|
To clear the selection and start over, right-click on the selection and choose Clear Selection, or press the ESC key on your keyboard. |

|
To book multiple rooms at the same time, click and drag to select each date range for the rooms you wish to book. You can select rooms for different date ranges if you wish. |
Right-click on the selection and choose Book Reservation, or press Enter on your keyboard.
The Add Room screen will appear.
Add a guest as follows:
Select the guests for the room. Note:
You can add a guest now, or you can add a guest after you book the
room. (When you click Book, the Add Reservation window will appear
- you can add a guest from there). If you decide to add a guest now:
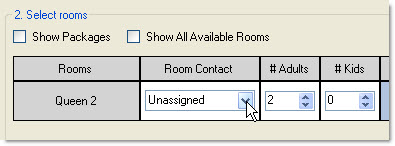
Click in the Room Contact section of the window to add a guest.
The Room Contact section of the window will change as indicated below.
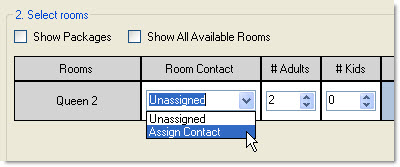
Left click the menu in
the Room Contact section and choose the option for Assign Contact.
Begin typing in either the last name or first name field to bring up a list of guests beginning with that letter.
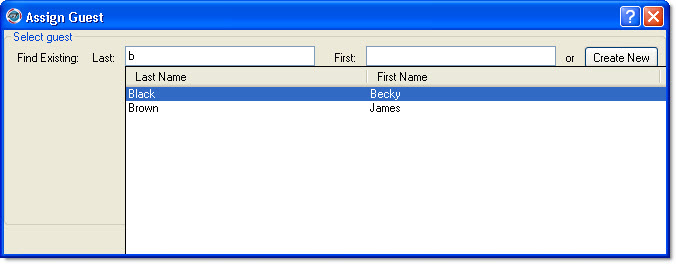
Click the guest name to select it.
The guest's information will appear.
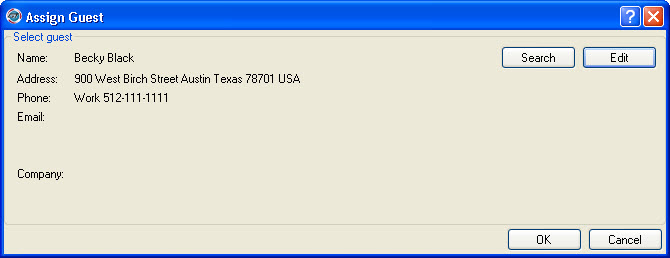
Click OK to accept the guest or click Edit to edit the guest's information.
Complete the rest of the information for the reservation as follows:
Select the number of adults and number of children.
Select the rate at which to book the room from the Rate Type drop-down list.
Adjust the rate if necessary.
% discount - apply a discount percentage
$ discount - apply a dollar amount discount
Flat rate per night - change the rate to a certain amount per night
Manual override - allows you to edit the per-night rate for each room by right-clicking in the room night cell (not available for packages)
You can also click Show Packages to view available lodging packages for the selected date(s).

Click Book to book the room.
The Add Reservation window will appear where you can add additional information about the reservation.
Click the reservation and drag it to the new room, to change a reservation to another date in the same room, or to change the reservation to another date in a different room.

Hover your mouse over the left or right edge of the reservation, and the mouse cursor will change into an arrow. Depress the left mouse button and drag either right or left to extend or shorten the reservation, and release the mouse button to save your changes.
Click and drag to select as many rooms as you wish. These rooms can be selected for different nights if you have guests on the same reservation arriving on different days.
Right-click on the selection, and choose Book Reservation.
Assign guests by name to each room if you wish (this can also be done at a later time)
Click the Book button.
You can then convert
the reservation to a group if you wish.
Click the Print icon.
The following window will appear.
Select the date range to print, and select any options.
A copy of the occupancy map will generate in Excel. If you do not have Excel, it will generate an HTML page and display in your web browser.